Crafting Connections: Freebie
Showing posts with label Freebie. Show all posts

Teaching ELA Content through these Teach-and-Task Lessons!

Thursday, February 25, 2021
Have you ever felt bogged down with keeping all of the components of your upcoming lessons organized? I know I often did! I would have piles for each lesson. The pile might include a book I was planning to reference, a few papers or posters that I was going to display using the document camera, and of course, a set of clipped worksheets that would allow for independent practice.

I created a new line of ELA resources that could help reduce the number of stacks on your desk. They are paperless and compatible with Google Slides. I have been calling them my "teach-and-task lessons" because each lesson includes instructional slides and matching activities to follow up the content that you have just taught. I have teach-and-task lessons for twelve important ELA topics. (All of the topics are listed near the end of this post.) Let me show you how they are structured by sharing images and explanations from my main idea set. 

Check out Deb's teach-and-task lessons. They include both instructional slides and practice slides for students. Pictured here are some slides from my main idea set, but I have lessons for twelve different ELA topics.


Main Idea Lesson #2: Teaching Slides (Slides 1-7)

Check out Deb's teach-and-task lessons. They include both instructional slides and practice slides for students. Pictured here are some slides from my main idea set, but I have lessons for twelve different ELA topics.
The first two slides are used to introduce the ice cream cone graphic organizer. 

Next, students watch as you guide them through reading a passage, identifying the main idea, and writing it in the cone section of the graphic organizer. The speech bubbles make it so that the answers are right on the slides for you, and you (as the teacher) don't have to try to come up with the main idea while you are teaching.
Check out Deb's teach-and-task lessons. They include both instructional slides and practice slides for students. Pictured here are some slides from my main idea set, but I have lessons for twelve different ELA topics.

Check out Deb's teach-and-task lessons. They include both instructional slides and practice slides for students. Pictured here are some slides from my main idea set, but I have lessons for twelve different ELA topics.
After identifying the main idea, you and your students can reread the passage, and view the important details that support the main idea sentence. When you advance to the seventh slide, they will see how the details have been added to the graphic organizer. 
Check out Deb's teach-and-task lessons. They include both instructional slides and practice slides for students. Pictured here are some slides from my main idea set, but I have lessons for twelve different ELA topics.


Main Idea Lesson #2: Task Slides (Slides 8-11)

Check out Deb's teach-and-task lessons. They include both instructional slides and practice slides for students. Pictured here are some slides from my main idea set, but I have lessons for twelve different ELA topics.
After working through the teaching slides, now it is the students' turn to practice with these two practice passages. They read the passages and fill out the graphic organizers independently. (The yellow boxes are text boxes.) If they want to refer to the teaching slides, they are readily available for easy reference.
Check out Deb's teach-and-task lessons. They include both instructional slides and practice slides for students. Pictured here are some slides from my main idea set, but I have lessons for twelve different ELA topics.

This is just one of the lessons in my main idea set. Teachers who purchase the main idea set will receive four lessons. The lessons advance from basic content to more complex. You can use these lessons over the course of four days to provide lots of targeted main idea instruction to your students.

A Complete List of Topics

As I mentioned earlier, I currently have lessons like this for twelve ELA topics! Click on the links below to view each topic.

I hope you enjoy using these teach-and-task lessons as much as I enjoyed creating them! 

Deb 


Pin this image to revisit this topic later:
Check out Deb's teach-and-task lessons. They include both instructional slides and practice slides for students. Pictured here are some slides from my main idea set, but I have lessons for twelve different ELA topics.


Anchor Chart: Making Deep Connections {FREEBIE}

Monday, September 21, 2020

Here is a scene that replayed itself more often than I would like to admit when I was teaching reading. Has it ever happened to you? When our reading group time was drawing to a close, I would announce the pages I expected my students to read on their own, hand each student a sticky note, and tell them their assignment was to read the assigned pages and record a connection they made while reading the pages. From previous lessons, students already knew that they could choose between making a text-to-self connection, a text-to-text connection, or a text-to-world connection. I had modeled writing strong connections several times, and I felt like students should know my expectations.

Much to my disappointment, however, more than half of my students would return to the next day's reading group with a very weak connection quickly scribbled on their sticky note... something like "I can connect with Peter because we both have annoying little brothers", or "Shiloh reminds me of A Dog's Life because both books are about a dog". I would ask questions to pull a deeper connection out of each student, but it often felt like I was exerting a lot more effort than my students were putting forth.

Then, one day, I ran across a blog post by Krista from The Second Grade Superkids. She shared a lesson she did with her students where she explained the difference between deep connections and surface connections. (The lesson can be traced back to Tanny McGregor's book called Comprehension Connections.) The lesson requires a glass of water, a ping-pong ball, and a golf ball. She began the lesson by dropping the ping-pong ball into the glass of water. Obviously, it stayed afloat on the surface of the water. She compared this floating ball to the surface connections we make while reading. Surface connections do not help us understand the story any better- they just sit on the surface of the text. Then she dropped the golf ball into the water, and it immediately sank to the bottom of the glass. She compared the golf ball to the deep connections that we should make while reading. Deep connections help us understand the story and infer the author's message.

This lesson resonated with me. I wish I would have found this blog post while I was still teaching reading groups!! I loved the analogy in this lesson so much that I immediately pulled out my anchor chart and markers, and created a connections anchor chart that illustrated the point. I believe hanging the anchor chart will serve as a reminder for students long after the initial lesson presentation is over.


Teach your students the difference between a surface connection and a deep connection with this anchor chart idea! After this lesson, your students will be more proficient at making connections while they are reading. A FREE personal anchor chart is also included!

I decided to share this lesson idea and anchor chart with you today in case you want to replicate it for your students! At the beginning of the school year, we teachers spend a lot of time teaching students our expectations, and this falls right in line with teaching students our expectations when we ask them to make a connection to what they are reading. If you want to dive even further into this topic and show your students several examples of well-written deep connections, feel free to check out my Making Connections PowerPoint or bundle of resources.

Finally, I want to share two personal anchor charts I made related to this topic. (I call them personal anchor charts because students can glue them into their reading notebooks and refer to them whenever they wish.) As you can see, the first one provides definitions of the four types of connections. The second one is a replica of the anchor chart shown above.

Use these personal anchor charts to teach students about the four types of connections that a reader can make, and how to write a strong connection. The chart on the right is a replica of a larger anchor chart, and it is FREE!

The anchor chart on the left is part of my Personal Anchor Charts for 27 Reading Skills resource. Click on the link to check it out.

The anchor chart on the right is FREE! Click here to download it.


If you are looking for some ready-to-go resources for teaching your students about making deep connections rather than surface connections, feel free to check out my PowerPoint and/or bundle. It includes many examples of surface connections, along with revised deep connections. Just click on the image to check it out!


Thank you for stopping by today!

-Deb

Pin for future reference:
Teach your students the difference between a surface connection and a deep connection with this anchor chart idea! After this lesson, your students will be more proficient at making connections while they are reading. A FREE personal anchor chart is also included!


Types of Sentences: A Free Sorting Activity

Thursday, September 10, 2020
I frequently create sorting activities to use with my students. I am a huge fan of sorts for two main reasons. Most importantly, sorting activities require students to be actively engaged. When done with a partner, they involve many discussion opportunities, which is music to this ELL teacher's ears! I also like sorting activities because they are so versatile. Sorting activities can be an independent activity, a small group activity, or they can be easily adapted to create a whole-class activity, depending upon your current needs. In this blog post, I am sharing my types of sentences sort with you, and explaining how I have used it in a whole-class setting. I invite you to click on the image below to access it (it's free!), and decide for yourself how you want to use it with your students.

Have your students sort the 27 sentence strips into declarative, interrogative, imperative, and exclamatory envelopes. This FREE lesson can be used with small groups or the entire class. It includes the posters, sentences strips, and more!
Add caption

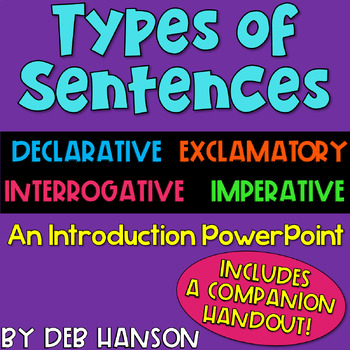
I designed this sorting activity to be part of a review lesson, done one or two days after the four types of sentences have been introduced. (I almost always introduce a new topic of study with a PowerPoint.) Click on the following image to view my Types of Sentences PowerPoint.


Step 1: Preparation

Before class, there are just a few items that need to be prepared. First, the four posters need to be printed and glued onto manila envelopes. (As you can see, my envelopes happen to be white.) The sentence strips also need to be printed and cut apart.

Have your students sort the 27 sentence strips into declarative, interrogative, imperative, and exclamatory envelopes. This FREE lesson can be used with small groups or the entire class. It includes the posters, sentences strips, and more!


Step 2: The Lesson

To begin the lesson, I ask students to turn to a neighbor and exchange interrogative sentences. Then, I display the interrogative poster (which is glued to an envelope) by placing it on the chalk tray, and we review what we already learned yesterday about an interrogative sentence's punctuation.

Have your students sort the 27 sentence strips into declarative, interrogative, imperative, and exclamatory envelopes. This FREE lesson can be used with small groups or the entire class. It includes the posters, sentences strips, and more!

I repeat this step with declarative sentences, imperative sentences, and exclamatory sentences. When this quick review is complete, all four envelopes are lined up across the chalk tray.

Now, it is time to sort the sentence strips. I tell students to take out their personal whiteboard, eraser, and marker. When everybody is ready, I pick up a strip and read it to the class. Each student writes what type of sentence it is on their marker board. (I let them use abbreviations- D, Intg, Imp, and E.) Using my popsicle sticks, I randomly choose a student to share their answer with the class. I invite the student to come forward, add the correct punctuation to the strip, and drop it in the appropriate envelope. This process is repeated with all 27 strips.

Have your students sort the 27 sentence strips into declarative, interrogative, imperative, and exclamatory envelopes. This FREE lesson can be used with small groups or the entire class. It includes the posters, sentences strips, and more!

Have your students sort the 27 sentence strips into declarative, interrogative, imperative, and exclamatory envelopes. This FREE lesson can be used with small groups or the entire class. It includes the posters, sentences strips, and more!

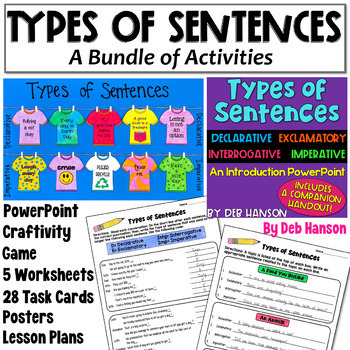
I hope you and your students enjoy this lesson! If you happen to be looking for additional activities, feel free to check out my Types of Sentences Bundle!

This types of sentences bundle is full of many engaging activities, including a PowerPoint, craftivity, worksheets, and games


-Deb


Pin this image for future reference!
Have your students sort the 27 sentence strips into declarative, interrogative, imperative, and exclamatory envelopes. This FREE lesson can be used with small groups or the entire class. It includes the posters, sentences strips, and more!


Text Evidence: A Lesson for Upper Elementary Students

Sunday, March 1, 2020

Text Evidence... it's of huge importance in the upper elementary grades! After all, it's the first standard listed for Reading: Literature and Reading: Informational Text in grades 3, 4, and 5. For those of you who work with the Common Core standards, 4th and 5th grade students are expected to be able to answer text questions by pointing to a section of the text...
    1.)  that provides the exact answer
and 
2.) that helps them to infer an answer

I created the following lesson to use with upper elementary students. If you would like to replicate the lesson to use with your own students, click on the image below. You can download all of the printables shown in this blog post for free!


Teach students to support their answers by citing text evidence.This blog post includes free printables so that you can replicate the entire lesson with your upper elementary students.

Part 1: Anchor Chart

Prior to the start of the lesson, assemble the top half of the anchor chart so that it is ready to go when class begins. (Do not include the questions or answers shown at the bottom of the anchor chart.)

To begin the lesson with students, point to the anchor chart title, and then discuss what the dot dude characters are thinking. Ask a student volunteer to read the paragraph aloud for the rest of the class. Tell students that two questions follow this text. Read the first question to the students and ask them whether it is a "right-here-in-the-text" question or an "infer-with-text-clues" question. Write the question on the correct side of the anchor chart, and then have students help you answer the question. Repeat the process with the second question.

This text evidence anchor chart reminds students that some answers are explicitly stated, and some answers must be inferred. This blog post includes free printables so that you can replicate the anchor chart!

Part 2: Introduce Sentence Starters 

After you complete the anchor chart, pass out the bookmark papers to your students, and tell them that the two types of questions require slightly different sentence starters. 
These free text evidence bookmarks remind students that some answers are explicitly stated, and some answers must be inferred. This blog post includes free printables so that you can replicate the anchor chart!
The set of five sentence starters on the left is useful when the answer is explicitly stated in the text. The set of five sentence starters displayed on the right is especially valuable when students must infer in order to determine the answer. 

Tell students to cut around the outside box and then fold it in half to create a two-sided bookmark. This bookmark can now be used as a reference tool throughout your text evidence unit, and throughout the school year.
These free text evidence bookmarks remind students that some answers are explicitly stated, and some answers must be inferred. This blog post includes free printables so that you can replicate the anchor chart!

Part 3: Practice with a Partner

For the final part of this large group lesson, have students work with a partner. To begin, tell them to quickly decide which of them is Partner A, and which is Partner B. Hand each group a dry-erase board, marker, and eraser. 
1.  Place "The Cobra" passage under your document camera and invite the groups to read it quietly
     to themselves. (I recommend covering the questions for now.)
2.  Tell students that for this passage, Partner A will write on the clipboard while Partner B will 
     handle the bookmarks. 
3.  Display Question #1.
4.  Tell partners to discuss whether it is a "right-there" question or a "stop-and-infer" question and 
     then answer the question.
5.  Partner A should write the answer on the whiteboard. (Students must use one of the sentence 
     starters from the bookmark, as well.)
6.  When all of the groups are done, have them display their answers. Partner A should hold up the 
     whiteboard, and Partner B should hold up the bookmark so that the question type that they
     identified is facing you.
7.  Display Question #2 and repeat steps 4-6.
8.  Display Question #3 and repeat steps 4-6.
Free Text Evidence Passages! Teach students to support their answers by citing text evidence.This blog post includes free printables so that you can replicate the entire lesson with your upper elementary students.

When you have completed the first passage, place the second passage under the document camera and repeat the entire process outlined above. Instruct the partners to switch roles for this new passage. Partner B is now the writer while Partner A is in charge of handling the bookmarks.
Free Text Evidence Passages! Teach students to support their answers by citing text evidence.This blog post includes free printables so that you can replicate the entire lesson with your upper elementary students.

TEXT EVIDENCE... MORE PRACTICE OPPORTUNITIES!

In case you are interested, I have created a number of Text Evidence teaching resources that are available in my TpT store. Just click on the images to take a closer look at them!

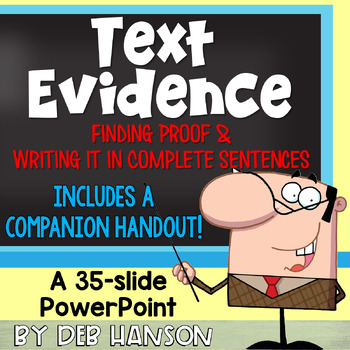
Teaching students to find text evidence to support their answers is an important reading strategy and test taking strategy. Use this Text Evidence PowerPoint to teach your students this important skill.

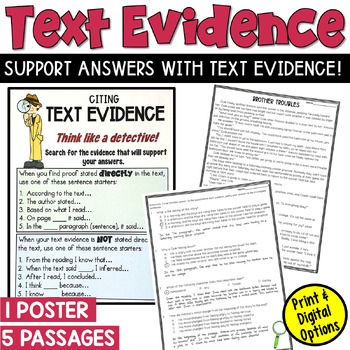
Teaching students to find text evidence to support their answers is an important reading strategy and test taking strategy. This post contains a FREE text evidence lesson!  It includes text evidence sentence starters, a free reading passage, and other text evidence activities.


Thank you for stopping by!
~Deb


Pin for future reference:
Teach students to support their answers by citing text evidence.This blog post includes free printables so that you can replicate the entire lesson with your upper elementary students.

Figurative Language Anchor Chart Activity {freebie}

Friday, February 14, 2020
Today's figurative language anchor chart is a little different than most of my other anchor charts because it is completely interactive, and it actually involves a cooperative activity. Also, you can download the materials and recreate this figurative language chart yourself!!
This figurative language anchor chart includes a cooperative activity. Visit this post to download the FREE materials and replicate this interactive lesson in your upper elementary classroom!

I would use this anchor chart as a cooperative test prep activity, when students have already studied each type of figurative language in-depth earlier in the school year. On standardized tests that I have viewed, students are given a sentence, a stanza, or a paragraph, and are asked to identify the literary device used within that piece of writing. This is entirely different from writing your own example sentence containing a given literary device, and I have witnessed students struggle with this type of test question. My hope is that by doing this type of figurative language analysis as a cooperative activity, students will be better prepared to analyze a sentence for a literary device independently.   

To prepare this activity (download here), I printed the first page- the literary device terms- in lime green. I printed the second page- the definitions- on pink paper, and I printed the final three pages- the examples embedded in sentences- on orange paper. Then I cut out all of the pieces.

I glue the terms on my chart paper prior to the start of class.
This figurative language anchor chart includes a cooperative activity. Visit this post to download the FREE materials and replicate this interactive lesson in your upper elementary classroom!

At the beginning of class, I pass out the remaining cards with the example sentences and the terms, one to each student.

Visit this post to download the FREE materials to do a figurative language sorting activity in your upper elementary or middle school classroom.

I explain that they must walk around the room, looking for their three partners. When they approach a potential partner, they must first exchange their cards without saying anything and read the sentence (or definition that was handed to them). After both partners have finished reading, only then can they discuss whether their cards are part of the same group. (I am hoping that the reading-before-talking requirement will force everyone to be actively engaged and fully participating.) Also, I require both students to make a comment before they move on.

Eventually, students will be gathered in groups of four, with one definition & three examples.
Visit this post to download the FREE materials to do a figurative language sorting activity in your upper elementary or middle school classroom.

Finally, groups take turns coming to the front of the room, placing their cards under the document camera, and naming their literary device. At this time, I also ask students to underline the words in the sentences that is a type of figurative language. After a group is done presenting, we tape the cards to the appropriate area of the anchor chart, and then it's another group's turn to present.  This figurative language anchor chart includes a cooperative activity. Visit this post to download the FREE materials and replicate this interactive lesson in your upper elementary classroom!


If you are looking for additional figurative language activities, feel free to check out my TpT store! This HUGE bundle is available to purchase, or you can buy individual items.

Figurative Language Activities for the upper elementary or middle school classroom! Includes a PowerPoint, games, craftivities, worksheets, partner plays, and more!!


~Deb

Pin for later:
This figurative language anchor chart includes a cooperative activity. Visit this post to download the FREE materials and replicate this interactive lesson in your upper elementary classroom!

Restating the Question in the Answer (Freebie included!)

Thursday, October 24, 2019

Teach your students to answer comprehension questions the right way: by putting the question in the answer. This blog post features a complete lesson which includes an anchor chart, a mentor text, and a FREE practice worksheet.

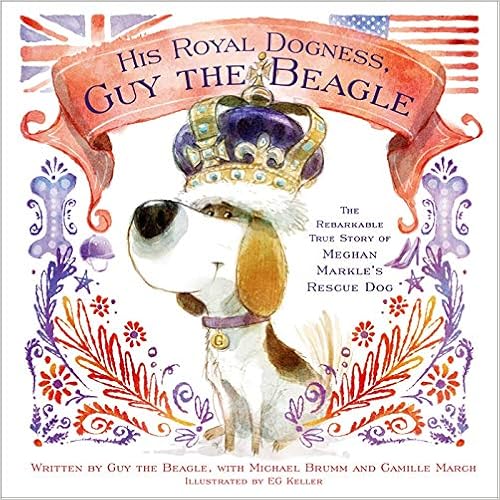
Have you ever given your students a worksheet that contains a reading passage followed by a handful of comprehension questions? If your students are like mine, you have learned over the years that you must explicitly tell students to write their answers in complete sentences. If you forget to mention this requirement, many students will compose one- or two-word answers. Therefore, I have found that taking the time to teach students to "restate the question" in the answer is well worth the time it takes. Since upper elementary students still love read-alouds, this is a fun lesson in which you can feature your favorite upper elementary picture book. (Full disclosure: An Amazon affiliate book link is included in this blog post.) As you will see below, I decided to use His Royal Dogness, Guy the Beagle, but any book will work with this lesson.

Before Reading

Let's back up a moment, though, and let me tell you how I begin this lesson. In preparation of this lesson, I write a list of simple questions based on traditional literature on anchor chart paper. 
Teach your students to answer comprehension questions the right way: by putting the question in the answer. This blog post features a complete lesson which includes an anchor chart, a mentor text, and a FREE practice worksheet.
Then, when class begins, I also distribute a white board, dry-erase marker, and an eraser to each PAIR of students. When each duo has the supplies it needs, I point out the title on the anchor chart, and tell students that I want them to help me answer each question by writing complete sentences that restate the question in the answer. Take a moment to model your expectations by choosing a student to ask you a random question. Write the answer on the board in a complete sentence. 

Instruct students to read Question #1, and then work with their partner to formulate a correct, complete answer and write it on their white board.
Teach your students to answer comprehension questions the right way: by putting the question in the answer. This blog post features a complete lesson which includes an anchor chart, a mentor text, and a FREE practice worksheet.
Ask a volunteer to share their answer. If it is correct, have them write it on the anchor chart, as well.

Instruct students to read Question #2, but this time, the other student should write on the white board. Continue this until all of the questions are answered.
Teach your students to answer comprehension questions the right way: by putting the question in the answer. This blog post features a complete lesson which includes an anchor chart, a mentor text, and a FREE practice worksheet.


During Reading

Once all five questions have been answered, we quickly put away our supplies, and I show them the picture book we're going to read together. I tell them that when we finish the book, they will be given a worksheet with questions about the book, and they will practice the skill of restating the question in the answer.
Teach your students to answer comprehension questions the right way: by putting the question in the answer. This blog post features a complete lesson which includes an anchor chart, a mentor text, and a FREE practice worksheet.
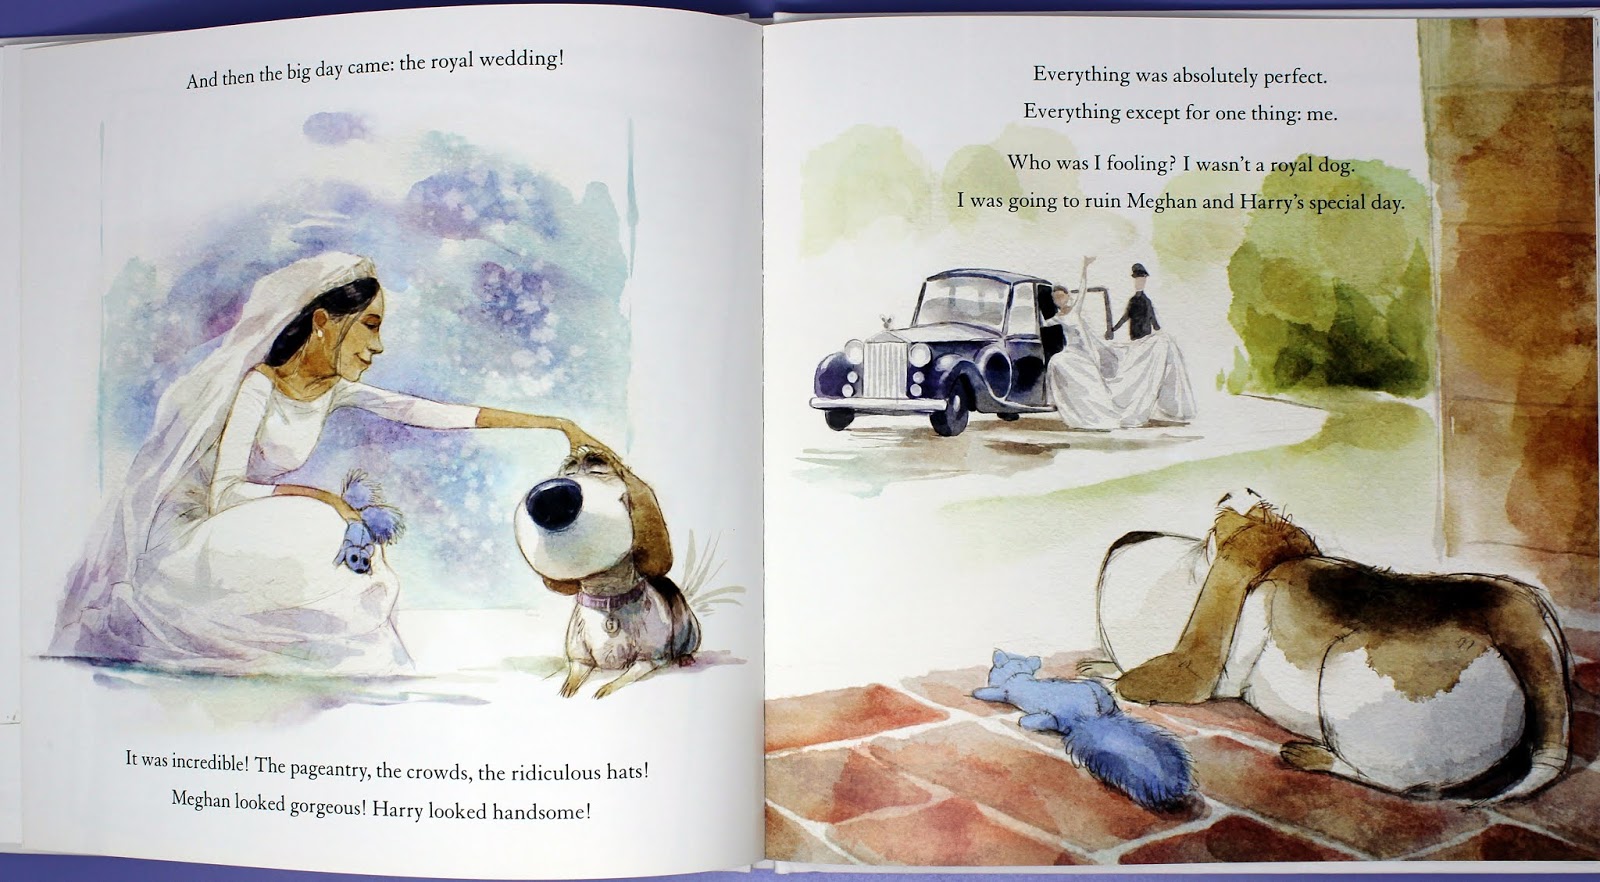
This is a wonderful picture book for so many reasons! First of all, it reminds students that if you are planning to welcome a new pet into your home, rescuing a pet from an animal shelter is a remarkable option. Secondly, as you can see below, the illustrations are outstanding.
Teach your students to answer comprehension questions the right way: by putting the question in the answer. This blog post features a complete lesson which includes an anchor chart, a mentor text, and a FREE practice worksheet.

Teach your students to answer comprehension questions the right way: by putting the question in the answer. This blog post features a complete lesson which includes an anchor chart, a mentor text, and a FREE practice worksheet.

Teach your students to answer comprehension questions the right way: by putting the question in the answer. This blog post features a complete lesson which includes an anchor chart, a mentor text, and a FREE practice worksheet.

Also, this book is also perfect for upper elementary students because the authors use a lot of subtle humor throughout the book. It is fun to stop after sentences like the ones below and ask if they understand what the authors are alluding to when they say "English life isn't all kibble and roses", and why it is funny when the authors say that "in England, dogs go to the bathroom on the left side of the hydrant".
Teach your students to answer comprehension questions the right way: by putting the question in the answer. This blog post features a complete lesson which includes an anchor chart, a mentor text, and a FREE practice worksheet.

After Reading

After you are done enjoying the story with your students, hand out the worksheet (click HERE or on the image below to download it). Remind students to answer the questions in complete sentences that restate the question in the answer.
Teach your students to answer comprehension questions the right way: by putting the question in the answer. This blog post features a complete lesson which includes an anchor chart, a mentor text, and a FREE practice worksheet.

If you're looking for another ready-to-go lesson related to this topic, feel free to check out my Restating the Question PowerPoint!

~Deb

Pin for later:
Teach your students to answer comprehension questions the right way: by putting the question in the answer. This blog post features a complete lesson which includes an anchor chart, a mentor text, and a FREE practice worksheet.


Teaching Plot with a Picture Book... with a freebie!

Wednesday, August 28, 2019
What is the first ELA topic you address each school year? When I co-taught in 5th-grade classrooms, we always began by teaching PLOT ELEMENTS. I would introduce the topic with my PowerPoint on the first day, but on the second day I would dig out a picture book!

When teaching students about plot elements, I highly recommend creating a plot diagram anchor chart for a picture book you've read with your students. This blog post contains a lesson idea and a free student printable!

Picture books are perfect for teaching plot elements in grades 4-6. As we all know, upper elementary and middle school students still love picture books. Another benefit is that they are short- in one class period you can read an entire picture book and plot the story on a plot diagram. As I have mentioned in previous blog posts, Margie Palatini is my go-to author when I am looking for picture books to use with my upper elementary students, so I chose one of her hilarious books to use in this plot lesson.


Before class, I draw a basic plot diagram on an anchor chart (the black line only). Then, as soon as class begins, I ask the students to recall what they learned yesterday to help me label the various parts of the plot diagram.

Next, I explain that I am going to read aloud a picture book to them, and when we are done, we are going to plot the story on our anchor chart. (This is also when I show them the book cover and tell them that Margie Palatini is my all-time favorite author of picture books because I am constantly laughing out loud when I read her books… which they are about to witness for themselves! I tell them that most kindergartners and first graders would enjoy this book, but a lot of the humor would “go over their heads”. As fifth graders, though, I think that they will really enjoy this book and fully appreciate the author’s humor. This usually causes my students to sit up a little taller and they become very good listeners! (Amazon affiliate link follows.)

After we finish the book, students help me write sentences that summarize the exposition, rising action, climax, falling action, and resolution of the book on the anchor chart.


Plot Diagram Anchor Chart: When teaching students about plot elements, I highly recommend creating a plot diagram anchor chart for a picture book you've read with your students. This blog post contains a lesson idea and a free student printable!


Finally, I give each student the exit ticket shown below. (Click HERE to download it for FREE!) I also set the anchor chart facedown on a table until all students have finished their exit tickets.

I ask students to independently label each box on the plot diagram with its formal name, and write a short definition to explain what typically happens during each part of the plot. After class, I scan the exit tickets to check for understanding. Students who completed the exit ticket activity with ease are allowed to tackle my plot task cards independently the next day, while the classroom teacher and I work with small groups of students who found the exit ticket more challenging. (Typically, the classroom teacher quickly meets with students who had one or two minor errors on the exit ticket, while I work with students who appear to need a higher level of support.) The plot tri-folds pictured at the end of this post is my go-to resource for working with a small group.

If you are looking for additional plot activities to use with your upper elementary and middle school students, I invite you to visit my TpT store and check out my resources for teaching students about plot. Click on any of the images below, or click HERE to view a complete list.

These plot task cards include four original short stories! Students complete a plot diagram for each narrative.

Use this plot PowerPoint to teach your students about plot elements. After being introduced to the elements of a plot diagram, students will read a short story and fill out a plot diagram. It includes a companion handout! Use this plot PowerPoint to teach your students about plot elements. After being introduced to the elements of a plot diagram, students will read a short story and fill out a plot diagram.


These four plot tri-folds target the skill of analyzing the plot progression in a book, story, or reading passage. Use these plot elements tri-folds over the course of 4 days to provide targeted instruction on this topic.


Thanks for stopping by!

~Deb


Pin for future reference:
When teaching students about plot elements, I highly recommend creating a plot diagram anchor chart for a picture book you've read with your students. This blog post contains a lesson idea and a free student printable!

Powered by Blogger.
Back to Top